The H.264/MPEG-4 AVC compression codec is widely used by most consumer and professional cameras and camcorders. The format is capable of compressing image files at a higher efficency than that of more convertional image-compressing formats like MPEG-4 or MPEG-2, this advanced feature makes it possible to record longer length of high-definition video footage. This artcile, we will cover the topic of working H.264 with Final Cut Pro X.

Natively editing H.264 with FCP X
Here, "native" means that you edit your project use the same H.264 video format that your camera/camcorder shot. Although you can swiftly transfer the small file size H.264 files from your camera/camcorder to your computer. However, when you take into consideration for the file rendering time, computer hardware costs or better integration with other video formats in the same project, H.264 might not be your good choice. And following are the problem that you are likely to encounter with when editing H.264 natively with FCP X.
1. H.264 is mathematically intense. It takes some serious computer horsepower to decode its compression.
2. Because it is so mathematically challenging, it takes longer to render H.264 files than other formats.
3. As H.264 is an 8-bit format shot by HDSLR, which means you are potentially compromising your effects and especially color correction and composing gradients.
4. H.264 does not integrate easily with other video formats.
Benefits of transcoding H.264 to Prores for FCP X editing
As FCP X does not edit H.264 natively, you must transcode H.264 into a more compatible file format. For FCP X users, Prores can be the best editing codec for you. Although transcoding H.264 to Apple Prores creates larger files that are larger than the native H.264 files, however, there are so many benefits to editing Prores with FCP X.
1. Prores is less hardware intensive than H.264, you don't need a fancy graphics card and you don't need as fast a computer to edit these transcoded formats.
2. The Prores is a 16-bit container, which can significantly improve the quality of your rendered effects.
Best tool for encoding H.264 to Apple Prores codec
If you are looking for a workable and simple tool to generate Prores codec from H.264 format, Pavtube HD Video Converter for Mac (best HD Video Converter for Mac review) are highly recommended here. The program can do you a great favor to encode H.264 to FCP X best editing formats - Apple Prores codec in various different types, you can choose of the most most suitable codec types by following the standards below:
If you computer is old or slow, or you just want to do some rough editing, you can select to output "Apple Prores Proxy)(*.mov)"or "Apple Prores (LT)(*.mov)" format to save more space and bandwidth. However, if your computer are powerful enough to handle multicam and high-resolution video and you are going to do many effects editing work with FCP X, you'd better choose to output "Apple Prores 422(*.mov)"or "Apple Prores 422(HQ)(*.mov)" for better performance.
Still have problem to edit other file formats such as AVI, WMV, MP4, MKV, MOV, FLV, etc with FCP X, never mind, feel free to download our beneficial tool to fix your issue with ease.
How to Transcode H.264 to Apple Prores Codec for FCP X Editing?
Step 1: Load files compressed with H.264 codec into the program.
After transferring the video footage from the camera/camcorder to your Mac local drive, launch the program on your Mac computer, from "File" drop-down option, select "add Video/Audio" to add H.264 files into the program.

Step 2: Select output file format.
Click "Format"bar, from its drop-down list, select FCP X best supported Apple Prores codec as the desired output file format. For online high quality editing on high performance computer, it is ideal to choose "Final Cut Pro"> "Apple Prores 422(*.mov)" or "Apple Prores 422(HQ)(*.mov)", for offline editing on slow performance computer, "Apple Prores Proxy)(*.mov)" or "Apple Prores (LT)(*.mov)" is recommended.

Step 3: Edit MOV video. (optional).
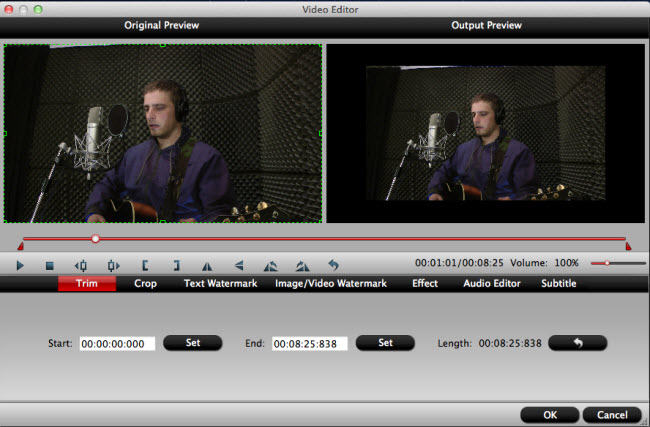
Check an item to active the "Video Editor" function, then click the pencil like icon on the top tool bar to open the "Video Editor" window, you can flip or roate video, trim video length, crop video black bars, add watermark, apply sepcial rendering effect, remove/replace audio in video, etc.

Step 4: Carry out the conversion process.
Go back to the main interface and press the right-bottom "Convert" icon on the right-bottom to start H.264 to Final Cut Pro X best favored Apple Prores codec encoding process.
When the conversion is done, you can easily import converted video to FCP X for furthering professional editing.
Useful Tips
- Review of 5 Best HD Video Converter for Mac (macOS Sierra Included)
- Import DJI Mavic Pro 4K video to iMovie for Editing
- Import DivX to iMovie (iMovie 11 Included)
- How to Convert ASF to iMovie (iMovie 11 Included) on Mac?
- Superior iMovie Alternatives for Mac (MacOS Sierra)
- 2017 Top 5 Best HD Video Converters for Mac OS X El Capitan/Yosemite/Mavericks


 Home
Home

 Free Trial HD Video Converter for Mac


