You may ask how to convert video to iPhone video for playback on iPhone easily? Pavtube Video to iPhone Converter will provide you a timely help on transferring all various popular video or audio formats to iPhone. And this article is to tell you how to use this powerful iPhone video converter freely to complete the conversion in detail.
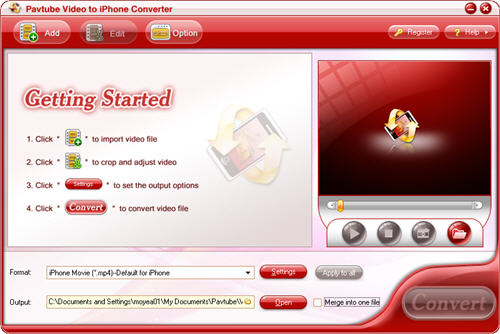
1.Download and install Pavtube Video to iPhone Converter, the main interface will pop up as below.
2.Import video files
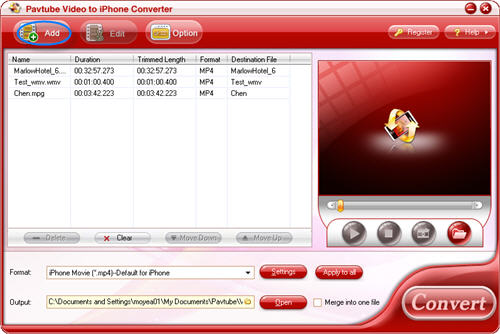
Click “Add” button to load video files into this program, and you will see this interface.
3.Set the output format, output path and merge multiple files
Click the “Format” drop-down list to select the format you prefer for each added file. And you can change the destination folder by checking the drop-down profile.

4.Set advanced settings
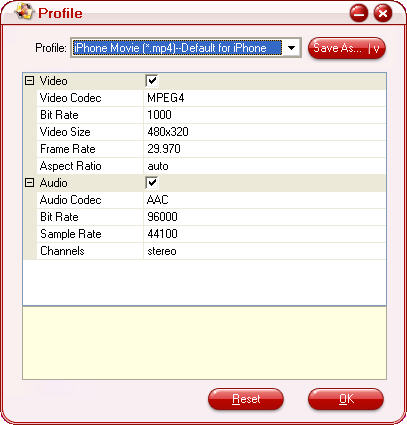
If you want to set the output quality, click the “Settings” button to open the Settings panel, where you can change the video codec, video bit rate, video frame rate, audio codec, audio bit rate, etc.
5.Convert
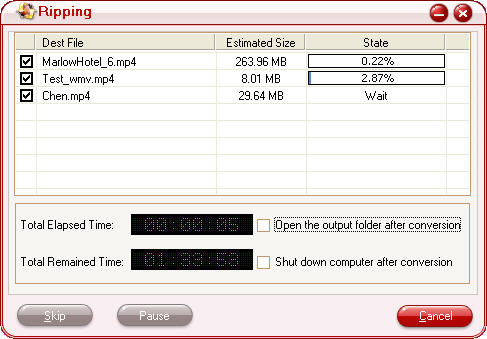
After choosing the settings, you only need to click “Convert” button on the toolbar to complete the task.
Other functions you may need:
6.Editing function
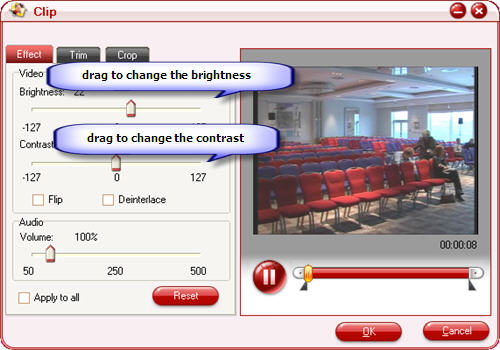
You can customize the brightness, contrast and video volume by dragging the slider bars under tab “Effect”.
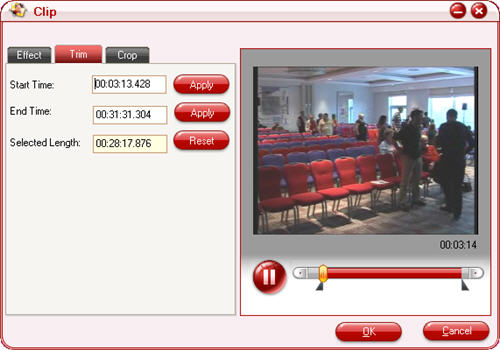
Pavtube Video to iPhone Converter allows you to trim your each video file so you can capture your favorite clips from your video files. After you click “Trim” button, you can preview your selected video file in the preview window and estimate what part of the movie you want to convert. Then enter the start time and end time to the time box or drag the start or the end bar to set the clips you want to convert. Then click “OK” button to save the change.
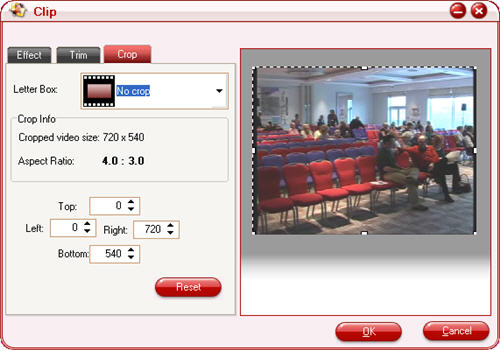
If you want to cut the edges off your video, you can click the “Crop” button to open the crop pane. There is a frame in dashed line around the movie video; you can drag it to cut off the sides you do not want.
7.Preview and snapshot
Double click the file or click “Play” button to take a preview of the whole movie. Moreover, if you want to save some your beloved pictures, you can click the “Snapshot” button to take a snapshot.

8.Preference settings: thumbnail and max process
You can change the preference settings of all files and the ripper, after choosing “Option >Preferences”.
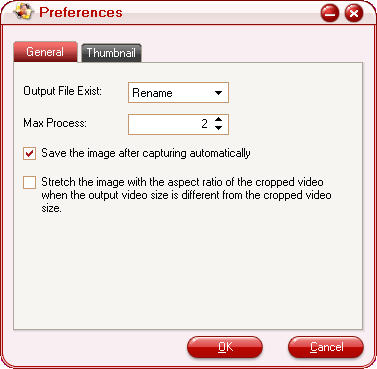
Set the ripper to rename the output file name and change the Max Process. Under the “Thumbnail” tab, you can set the image format and the image output location.
Hope this step-by-step guide will benefit you really. After the operation following this instruction, you can transfer your converted files into your iPhone now.
Useful Tips
- Convert AVCHD (MTS/M2TS) Videos for Playing on iPhone
- How to Record HD videos with the iPhone 5?
- View movies in format of WMV, MKV, AVI, TiVo and MTS on the new iPhone 5
- How to Sync Music, Photo, Video files from Mac to iPhone 5s?
- Watch Blu-ray ISO movies on Apple's new iPhone 5C
- Easy Way to Convert DVD ISO/IFO to iPhone 5S/5C on Mac


 Home
Home Free Trial Video Converter


