OpenShot Video Editor is a free, open-source video editor. It helps you to mix, join, edit and create the film that you have always dreamed of with your videos, photos, and music files. After edited videos, you can directly upload OpenShot videos to YouTube and Vimeo by "Upload to Web" button. This will automatically set the export settings that are compatible with the selected video website, and launch the Upload Video screen once the video file has been created. But if you want to share OpenShot videos to Instagram, it has no the option.
To upload OpenShot videos to Instagram, you need to export video files from OpenShot first, then make the video compatible with Instagram and finally post the OpenShot videos to Instagram. Below is the detailed workflow.
Part 1: Export Videos from OpenShot
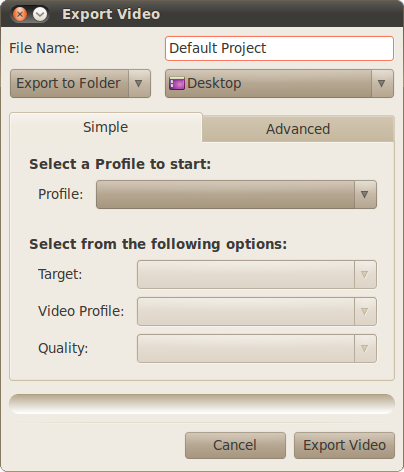
Once your have completed a project, you will want to export it to the correct format, based on your needs. OpenShot has many predefined formats to simplify this process. There are two modes to export a video in OpenShot, Simple Mode and Advanced Mode. Both modes share a common area at the top of the screen, General Options. Name your video file (no extension) and choose an export folder.
Launch Export Window
To launch the export window, click on the Export Video toolbar icon at the top of the main window, or choose File > Export Video.
Simple Mode
OpenShot has many predefined export formats, which cover the most common export scenarios. Select a Project Type, such as DVD or Web, and then choose the Target, Video Profile, and Quality. If you select All Formats, it will give you a list of all common formats, and let you pick the one you want.

Advanced Mode
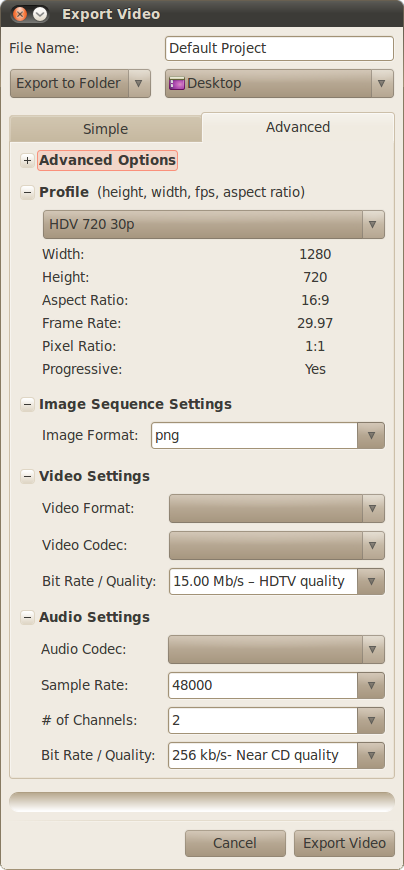
The advanced options should only be used by someone familiar with FFmpeg, since it is so easy to create invalid combinations of codecs, formats, and bit-rate settings. However, if you are familiar with these settings, any FFmpeg supported format/codec/bit-rate can be used, which opens up dozens and dozens of additional formats that can be used during the export process. You can also export your video as an image sequence, which can be useful if you intend to import this video into a program that requires image sequences, such as Blender.

Also, if you first select values for the Simple Mode, and then switch to the Advanced Mode, it will preselect all of the Simple Mode settings. Now, you need to use an instagram video converter for further editing to make the output video more compatible with Instagram.
Part 2: Make OpenShot Videos Suitable for Instagram
Pavtube Video Converter has built up something of a name for itself for producing powerful yet easy to use software. It can easily convert OpenShot videos to Instagram supported H.264 MP4 video files. Besides OpenShot, it also can convert other NLE software exported files to Instagram such as iMovie to Instagram, Final Cut Pro to Instagram, AviD, Premiere Pro CC to Instagram, etc. This Instagram video converter features high stability, user-friendly interface, powerful operating compatibility, fast video conversion speed, etc.
You can adjust video size, video bit rate, video frame and adjust audio codec, audio bitrate to meet all the specs of Instagram. With the built-in video editor, you can trim video length to make it during 3 seconds to 60 seconds. You also can change video aspect ratio to 1:1 for Instagram. By spliting or compressing video, you can make sure the video smaller than 50MB. In addition, you can select the best video aspect ratio for Instagram. For Mac users, this video converter can work on Mac well too.
Step-by-Step to Convert OpenShot video to Instagram
Step 1. Load OpenShot video files
Install and launch the Video Converter forInstagram on your computer, click "File" > "Add Video/Audio" to load OpenShot video video files. At the right window, user can watch the video and listen to audio first. If you have multiple OpenShot video which are needed to convert, you can put all the video files to one folder, then load the folder to this software, do batch video conversion. Aside from OpenShot videos, you also can add MP4, AVI, WMV, MOV, 4K video to convert to Instagram.

Step 2. Set Instagram Best Video Format
Click "Format" button to open drop-down list and there you can choose MP4 format. You can choose MP4 format for Instagram in "Common Video" and "HD Video" categories.

Step 3. Set Video file for Instagram
Now, click "Settings" on the main interface to start to adjust video and audio parameters to fit in Instagram according to the below specs.
Instagram Best Settings for Uploading
Formats: H.264 codec/MP4
Resolution: maximum width 1080 pixels (1080P)
Frame Rate: 29.96 frames per second
Bit Rate: 3,500 kbps video bitrate
Audio codec: AAC audio codec
Duration: 3 to 60 seconds

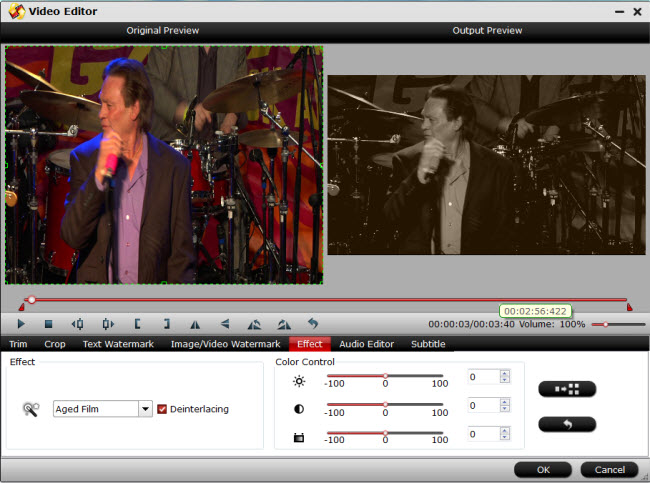
Now, click "Edit" to open video editing window. In “Video Editor” there are seven edit tabs: Trim, Crop, Text Watermark, Image/Video Watermark, Effect, Audio Editor and Subtitle. You are the host of video, you can do anything on video, just enjoy the happy video editing. Click "Crop", you can change the video aspect ratio in that window.

Step 4. Start OpenShot video to Instagram Conversion
After all the settings, just click "Convert" button, this software will do the complicated job, wait for a while, you can get your dreamed MP4 video files, then you can upload the converted OpenShot video to Instagram without any trouble.
How to Upload Converted OpenShot video to Instagram on Computer?
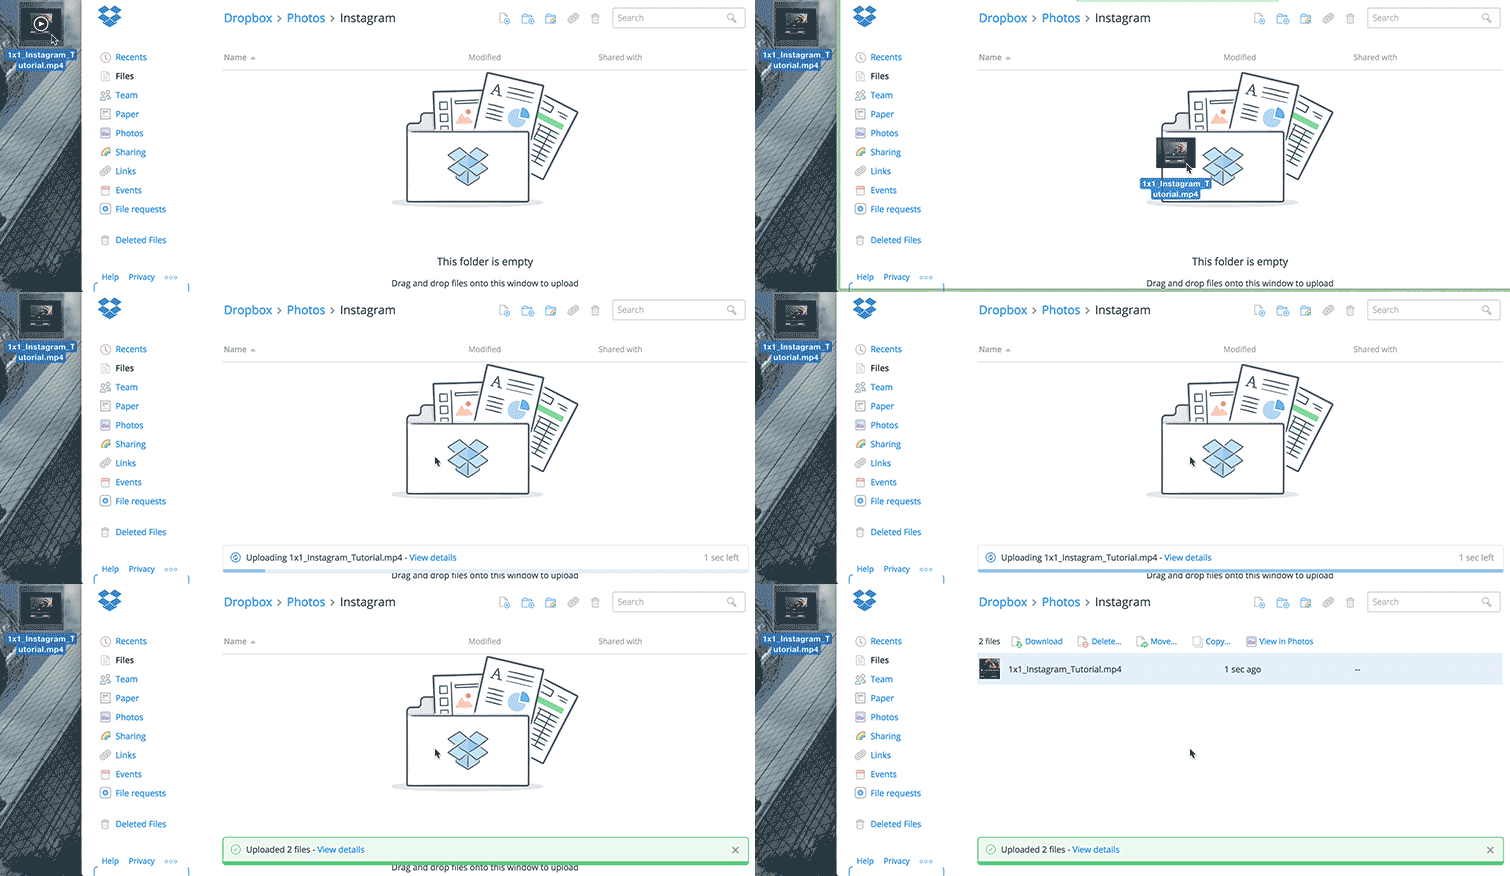
Dropbox works for both Mac and PC and will transfer files to iPhone, Android, and Windows phones. You will need both a Dropbox account on your computer and the Dropbox App on your phone.
1. Sign into your Dropbox account
2. Drag and Drop the compressed Instagram video file
3. Open the Dropbox App on your phone
4. Download the compressed Instagram video file to your phone
5. Open the Photos / Gallery app on your phone
6. Verify the file fully transferred


 Home
Home

 Free Trial Video Converter


