This is the quick start guide showing how to use Pavtube iMixMXF including guides of importing, editing, converting, multi-task output and more.
Preview, & Take Snapshots/Thumbnails
Output Format Settings ( Multi-Track Video Output )
Merge, split, choose MXF audio track
Choose Output Directory and Find the Output Folder
Edit MXF Videos on Editor Window
Convert MXF Files with Multi Processors and Multi Tasks
Import from File or Folder

Import from File: Clicking the Add Video button, you can specify exactly which MXF file or files you'd like to import to the program.
If you are importing MXF files from Panasonic P2 Cards with this button, the program will help you automatically match the video and audio tracks.

Import from Folder: This button helps detect and import all MXF files under the folder you specified.
Preview, & Take Snapshots/Thumbnails
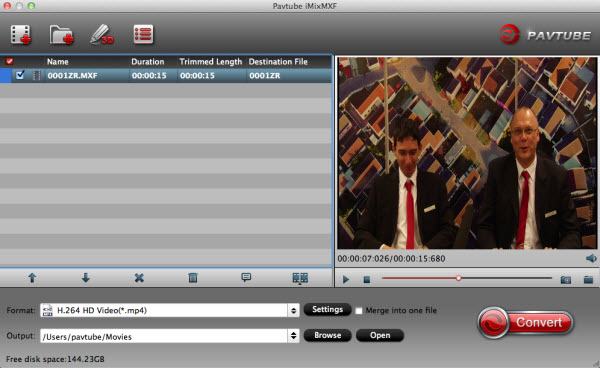
After importing, all files will be listed in the program, double click, or choose one of them and click the play button on preview pane, and you can preview the imported MXF. By clicking the camera button under the preview window, you can take snapshot from the playing window as Thumbnail or for other use. By clicking the folder button, you can find the snapshots you took.
Output Format Settings
Clicking the Format bar, you can choose output formats from the format list or customize which formats to be shown on the list.
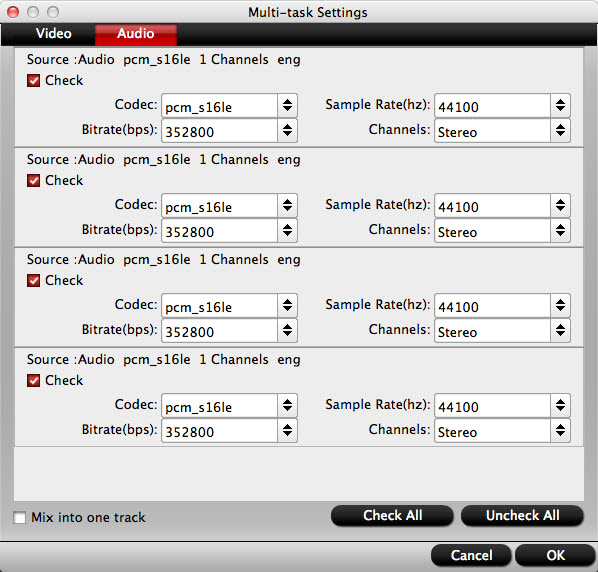
Please note that normally no matter how many files you have imported, you can only output the files with the same output format settings. But if you choose Multi-track Video output, you can output multiple videos with same multi-track format, but different track settings. All you need to do is to select one file on list, and click Settings to set. If you haven't specify the settings, the program will help you output with default settings. By default, all audio tracks will be checked and encoded to output.
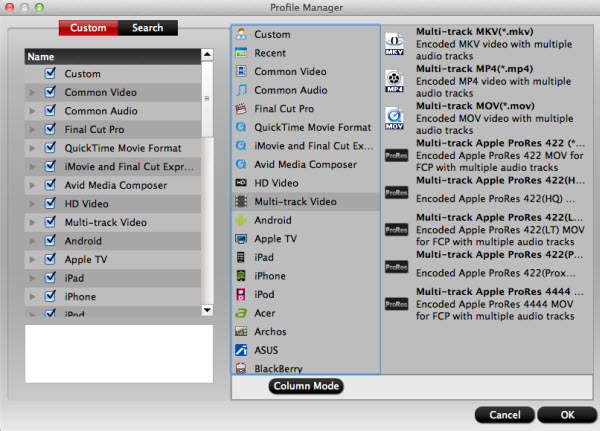
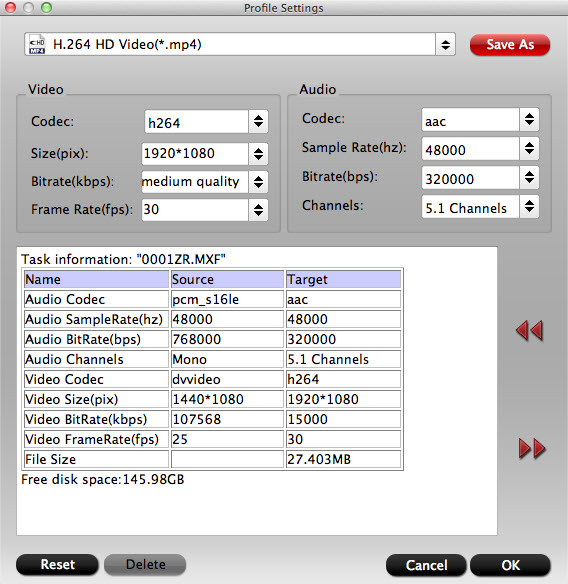
All formats here are set with optimized video/audio codecs, bitrates, frame rates, etc. But you can still specify as you like by clicking Settings button.
In the Settings window, you can choose or specify exactly the parameters you like. And in the Task information section, you can compare information from the original video and output video.
By clicking the Next and Previous buttons, you can choose to show information of the next or previous MXF file on list.
Multi-Track Video Output
This is an outstanding feature of Pavtube iMixMXF and its Windows version, MXF MultiMixer.
Currently, you can choose 8 multi-track output formats, Multi-track MKV, Multi-track MP4, and Multi-track MOV and 5 multi-track MOV output formats with Apple Prores codecs for FCP. The Apple prores codec output is only available in Mac version, not for Windows version. And Apple Prores codecs under FCP category cannot keep multi tracks. The only way to output multi-track Apple Prores is to chose them under Multi-track Video category.
Please note that currently you can't edit the MXF video if choosing multi-track output formats. And before clicking Settings button to set video/audio parameters, you need to choose a file from list.
In the Multi-track Settings window, you can choose which audio track to output, and specify what codec you'd like to encode with.
To mix the multiple audio tracks into one, you can check Mix into one track potion and confirm.
Merge, split, choose MXF audio track
Merge MXF files into one: By ticking the Merge into one file option behind Settings button, you can merge the ticked files in list into one single file.
Split MXF file into several small pieces: By clicking the Split button ![]() on file list, or from Edit menu, you can launch the Video Split window.
on file list, or from Edit menu, you can launch the Video Split window.
Ticking Enable to enable it, and then you can split the file by file count, time length, or file size.

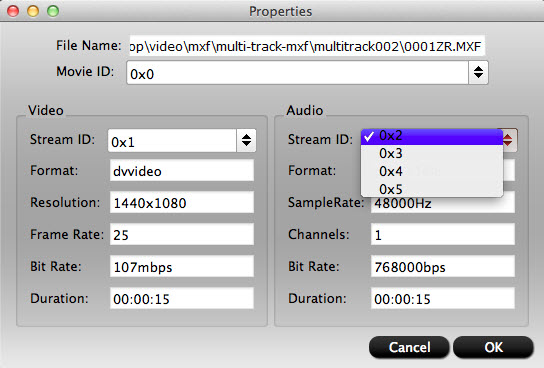
Choose MXF audio track: By clicking the Options button ![]() in format list, or from File menu, you can launch the Options window.
in format list, or from File menu, you can launch the Options window.
In the Stream ID box, you can choose which audio track you'd like to output. If you want to output multi-track formats, you needn't set here, just choose the right format, and click Settings button, you can choose which audio to be encoded and output.
Choose Output Directory and Find the Output Folder
By clicking Browse button on main interface, you can choose the directory where you'd like to put the output files.
By clicking Open button, you can popup the output folder.

Edit MXF Videos on Editor Window
iMixMXF is not only a MXF mixer and converter, but also a simple and easy MXF video editor.
But please note that currently you can't edit videos if choosing Multi-track output formats.
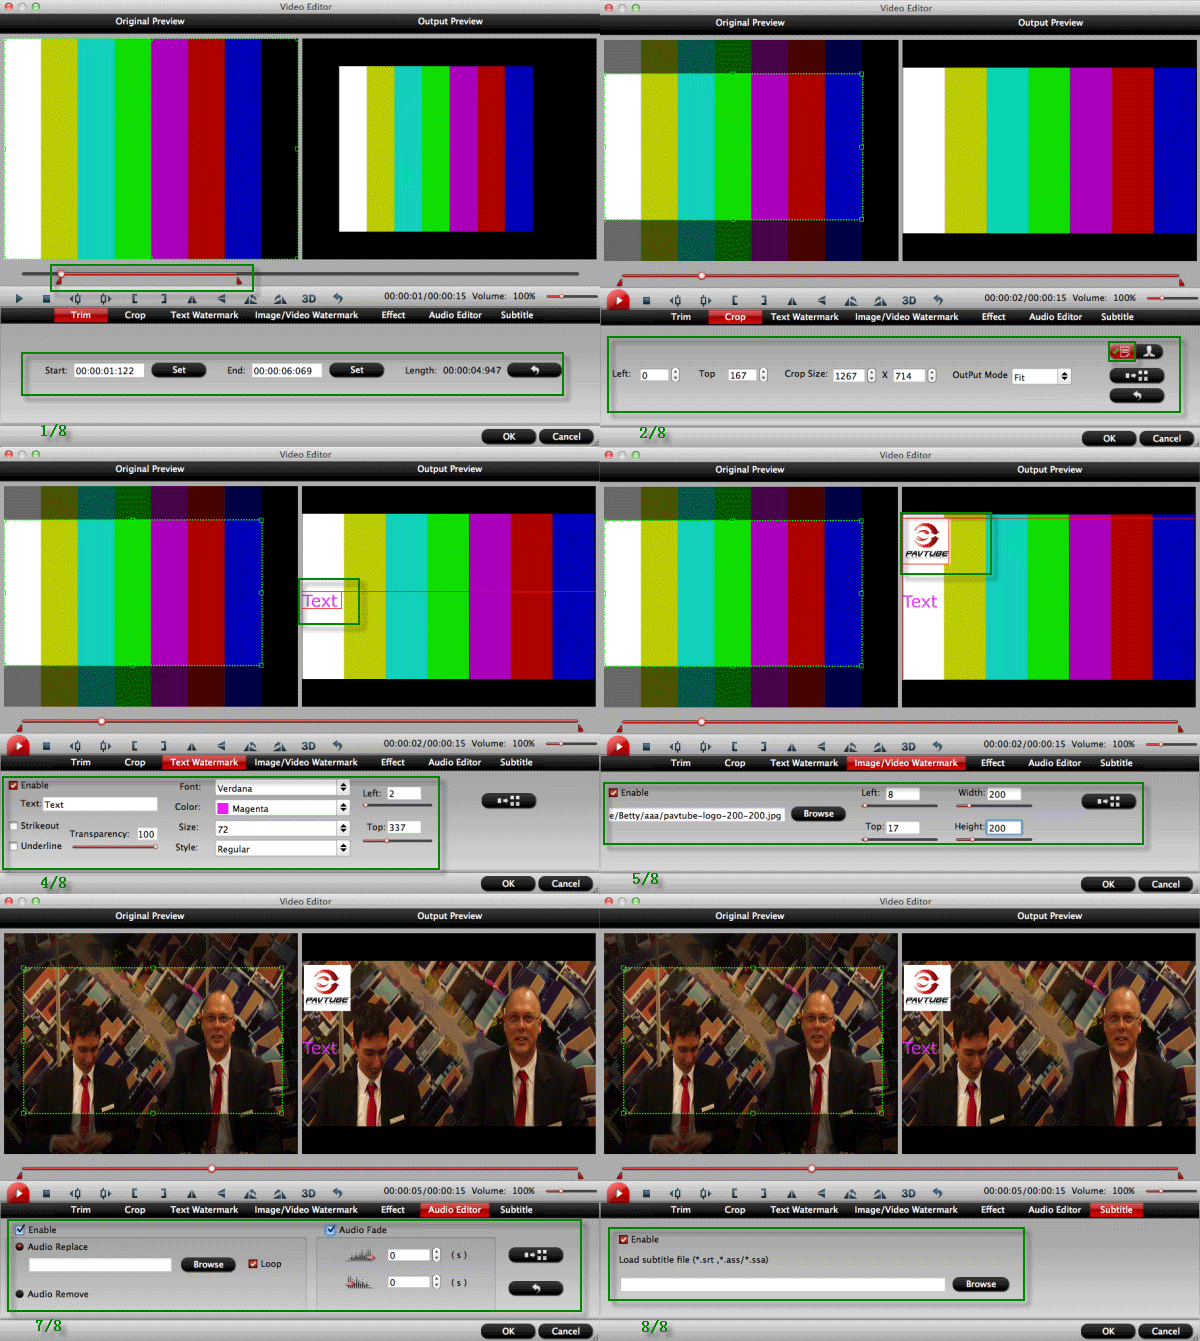
On the Editor Window, you can play and preview the original video and output effects. On the buttons bar, you can flip video, trim, add 3D effect, reset, or adjust volume.
And in the tabs, you can do more detailed editing.
Trim: You can trim off unwanted parts from starting and ending. You can either drag pointers on the process bar or set exact time point in Start and End boxes to set.
Crop: You can drag the edges on play window to specify or adjust parameters. You can also click the human button to switch to advanced mode. And then you can set display aspect ratio as well as output ratio and output mode.
Text Watermark: Checking Enable, you can add text watermark on the video. You can either set parameters or drag the text on preview screen to set its location.
Image/Video Watermark: In this section, you can add images or videos as watermark. The location can also be set by dragging on the preview screen.
Effect: Here you can add 3D or other special effects, or correct color by adjusting brightness, contrast, and saturation. You can also set to deinterlace here.
Audio Editor: You can either replace original audio or set audio fade in/out effects.
Subtitle: In this tab, you can add *.srt, *.ass, or *.ssa subtitle files to the video as hard subtitles.
Convert MXF Files with Multi Processors and Multi Tasks
Clicking the Convert button on main interface, you can go to Conversion window to start conversion.
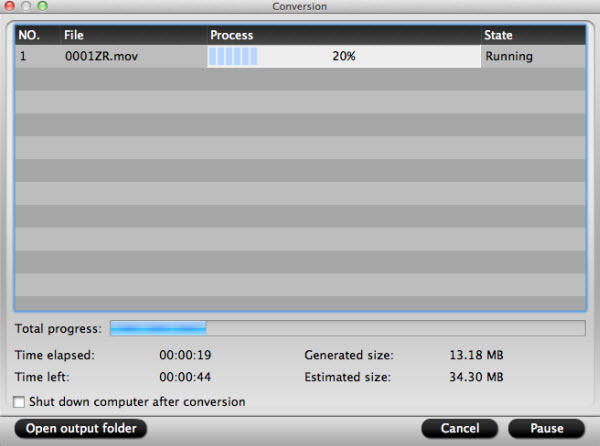
You can find conversion information on the window, such as Time elapsed, Time left, Generated size, and Estimated size.
Ticking "Shut down computer after conversion" option, you can leave the program running and do other things instead of waiting for the conversion.
After the conversion, you can click Open output folder to popup output directory with the converted files.


 Home
Home


