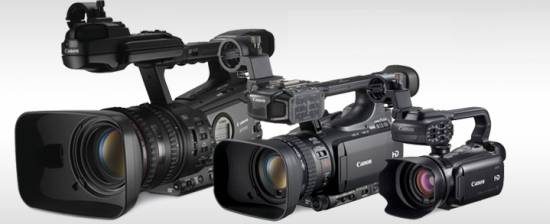
Canon XF305, XF300, XF105, and XF100 are the four models of the Company's XF-series professional camcorders. The Canon XF-Series Camcorders are ideal for Electronic News Gathering, documentary and independent filmmaking and event videography. Canon XF-series professional camcorders use XF Codec to record source footage and save them in MXF container.
The Canon XF Codec is an MPEG-2 4:2:2 50Mbps codec used for exceptional high-definition image quality, full non-linear editing (NLE) systems compatibility and efficient, robust workflow. MXF is a container or "wrapper" and inside you have the files. There is an increasing number of professional NLE's that can work with MXF files natively including Avid, Adobe Premiere Pro 3.1 or above, Sony Vegas, and GrassValley Edius. Native MXF access in Apple's Final Cut Pro and other Mac OS X applications can be achieved by using the MXF Import QT component from MXF4mac.
The “MXF” file format, however, is considered as a tough file type for editing. See a user question below:
“My company's production studio at our corporate headquarters did a shoot for us today, and the resulting files are MXF files. The hair-pulling thing is that we couldn’t import them into iMovie for using. What is the easiest way to go about editing with these types of MXF files in iMovie?”
If you are in the above mentioned situation, you can consider converting Canon MXF into Apple InterMediate Codec, the best suited format for iMovie before importing. Here comes Pavtube Media Magician for Mac to do this job. Targeted as an intuitive and easy-to-use camcorder companion tool for Mac users, this Mac app features powerful ability to handle camera/camcorder shootings captured in various file formats, covering MXF, AVCHD*(MTS, M2TS), AVCHD Lite*(MTS, M2TS), MOV, TOD, MOD, MP4, AVI, and more. Media Magician for Mac helps people backup, manage, and convert camera footage to fit different usages, including transferring videos directly from camera to local computer for backup, creating optimal files for working with NLEs, exporting videos for playback on iPhone, iPad, Apple TV, Android tablets & Smart phones, rewrapping source media from one format to another, lossless output source media in original file format or remux to MKV container format, and directly uploading onto YouTube for sharing. You can read the Media Magician for Mac review article to learn more about it.
How to Make MXF Files from Canon XF series More Compatible with iMovie on Mac?
To transcode Canon XF-series MXF files to AIC for editing with iMovie, follow these steps:
Step 1: ![]() Free download Media Magician for Mac Trial Version, install and launch it
Free download Media Magician for Mac Trial Version, install and launch it
Notes: The free trial version of Pavtube Media Magician for Mac has the following limitations:
1. It will add Pavtube logo watermark in output file(s).
2. Lossless output has a file size limit of 5 minutes.
If the free trial version does what you want, you can click Buy Now button below to purchase its full version to bypass the above mentioned free trial limitations.
![]()
Step 2: Add MXF files into Media Magician for Mac
There are two ways available to import source media files:
1) Import from camera/camcorder
Connect your camera with your Mac computer and run Pavtube Media Magician for Mac. This camcorder companion tool will detect your camera automatically and ask “Camcorder is connected. Are you ready to launch wizard now?” Click “Yes” to confirm.
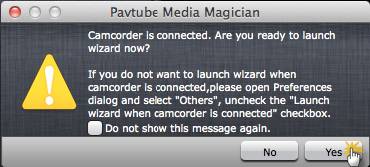
In the mean time, you are allowed to backup MXF footage directly from camera to local computer. Also, you can click the camera icon to load camcorder videos as well.
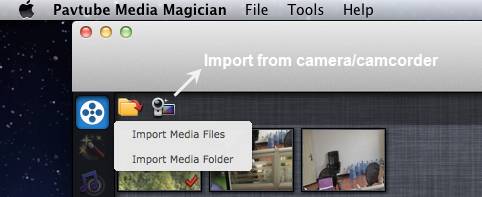
2) Import from local computer
If you already have stored MXF clips on your computer’s HDD, you can choose to “Import Media Files” or “Import Media Folder” to browse and load your source files from computer.
Step 3: Drag and drop Canon MXF files onto Timeline
After source MXF clips are imported into the Media Magician for Mac program, you need to drag and drop the clips that you want to transcode to AIC onto timeline.
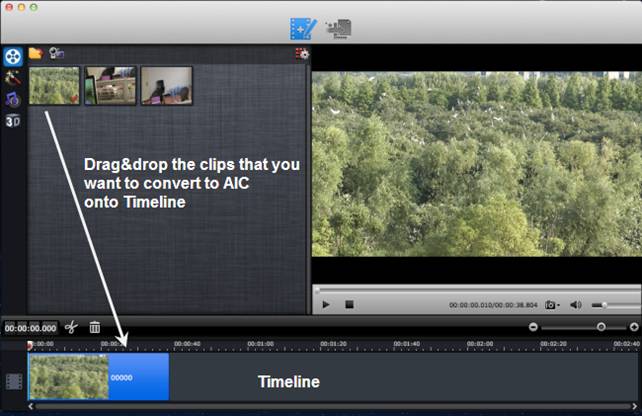
Step 4: Split/Cut/Reorder/Merge MXF clips (Optional)
If you would like to cut off unwanted parts of your MXF clips, rearrange them in your wanted order, or merge them into one file, you can use the control buttons on timeline to do this.
The control buttons on timeline help you locate frames accurately so that you can cut, trim, delete, and merge video clips in a much easier way.

Control buttons on Timeline
1. Time Display Controller: Move your mouse cursor on timeline, the opposite time point will be displayed here. Once you entered a time point into the time display box and click enter, the Preview Window and Timeline will switch to the frame of this time point. This helps to locate to the accurate frame that you want.
2. Zoom in and Zoom out: Drag the bar on top-right of timeline to Zoom in or out for better view.
3. Preview: Highlight a clip on timeline and click Play button, you can preview. Double click on a clip can also begin preview.
4. Trim: Put your cursor to the start or end point of a clip on timeline until it changes to trimmer. Drag the trimmer and you can trim off unwanted starting or ending.
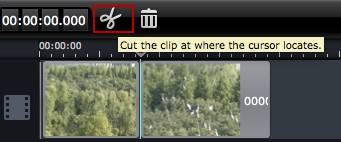
5. Cut: Drag the pointer to the right place; Put your cursor to process bar under preview window and select the right frame; Click the Scissors button and you can cut the clip. And then you can rearrange order or delete.
6. Delete: Highlight the unwanted clip on timeline, and click Delete button. You can also delete it with right-click menu.
7. Rearrange order: Drag and hold a clip to the right place until the place line shows. Drop the clip and it will be placed right there.
8. Merge and join: All files placed on timeline will be output as one file. So if you want to merge and join several clips, just drag them to timeline in right order.
Step 5: Convert MXF files to AIC for iMovie
Choose “Output” in the main interface, and click “Plus” icon to add conversion task before selecting output format. Then switch to “Editor” > “iMovie and Final Cut Express” and click “Start” to begin exporting MXF to AIC MOV for iMovie.

When the conversion finished, you can find out the generated AIC MOV files for using within iMovie from the “Output Path”.
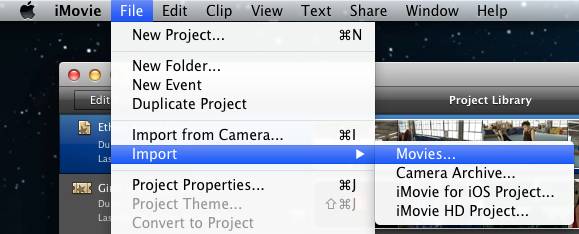
Launch iMovie, choose File > Import > Movies…, and browse to where you saved the generated AIC files to. Choose the videos that you’d like to add.
Useful Tips
- Import/Edit/Transcode Sony NEX-5N/NEX-7/A57/A65/A77 1080 50/60P AVCHD to iMovie on Mac
- Transcode TiVo Shows to AIC for Editing in iMovie and FCE
- Import Canon Rebel T4i (EOS 650D) MOV to iMovie for Editing – H.264 MOV to AIC Conversion
- Best Way to Import Nikon H.264 MOV to iMovie for Editing and Playing
- How to Convert QuickTime File to iMovie?
- Convert Sony AVCHD MTS/M2TS to AIC MOV for iMovie


 Home
Home Free Trial Media Magician for Mac


