Set Output File Location
The software will specify a default folder to save converted videos. If you’d like to change the output location, please click “Browse” button![]() and navigate to the folder you want to save videos to.
and navigate to the folder you want to save videos to.
After conversion you can click the “Open” button ![]() to open output folder and check the generated video or audio files.
to open output folder and check the generated video or audio files.
Set Output Format
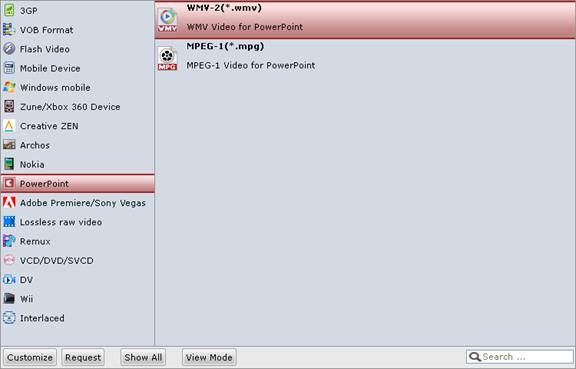
To select an output format, you can click on “Format” and find a desired video or audio format from the profile list that pops up. The profile list provides users with groups of flexible output solutions. There are output formats for various portable players, removable devices and editing software in the profile list. Select a desired format from the list, and then you can step into the conversion process. 
Tip 1: You are encouraged to use H.264 codec in order to take advantage of the GPU en-decoding acceleration of Nvidia CUDA enabled Graphics card.
Tip 2: In order to convert TOD to MPG format without losing quality, you’re suggested to choose “Remux”-> “MPEG-PS Video Remux (*.mpg)” format for conversion.
Tip 2: The Profile Manager helps you sort out the formats, hide rarely used ones, and submit your demands for new format to Pavtube in case that there is not a format that meets your needs. Find details in User Interface section.
Customize Profile Settings
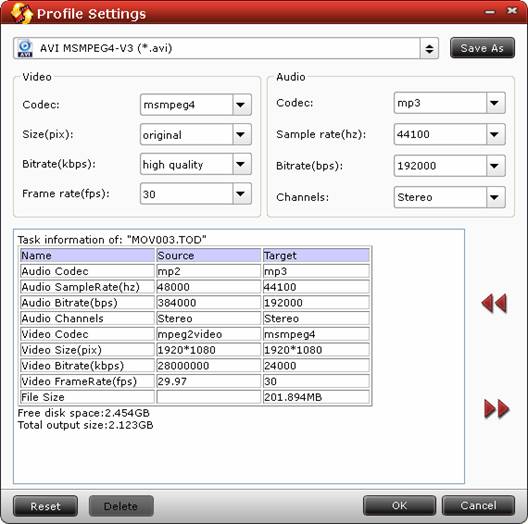
To further customize the output format, please click “Settings” button ![]() and adjust advanced video/ audio parameters.
and adjust advanced video/ audio parameters. 
Video Section: You can set Codec, Bit Rate, Size, and Frame Rate to optimize the quality of the video.
Audio Section: You can set Codec, Bit Rate, Sample Rate and Channels to make the quality better.
Save As: Click to save your settings as a new format.
To create a new format, you can adjust the audio and video parameter as you like, click "Save as"' button and rename the format before clicking "OK" to save the new format. When you'd like to use the new created format at next run, just click the format bar and find it in "Custom" group.
Reset: Click to reload the default settings.
Tips and Tricks on customizing settings:
1. To get 16:9 aspect ratio: set the Video Size to 1280*720/960*540/ 854*480/720*405/ 640*360.
2. To improve video quality: set video bitrate up.
3. To cut down file size: set video bitrate down.
4. To save your settings: click “Save As” and save it as a custom format.
5. To get AAC 5.1/AC3 5.1: set 5.1 channels in Audio Channels (5.1 channels is only available in a few of formats templates. Try your fortune in HD Video formats instead of Common Video).


 Home
Home


