It will be a better way to record your PC gameplay video with NVIDIA’s ShadowPlay to upload to Youtube for increasing your fans. To make the video special, you can edit the Shadowplay video with Davinci Resovle before posting it online. But the problem is that you can't import and edit Shadowplay video in Davinci Resovle sometimes.
Actually, Shadowplay uses the H.264 codec for video and the AAC codec for Audio and stores the video and audio streams in a MP4 container. H.264 MP4 video should be able to editable in Davinci Resolve according to Resolve supported video and audio format. However, neither H.264 codec nor MP4 container format is friendly to Davinci Resovle. Therefore, the best way to edit Shadowplay video in Davinci Resolve is to transcode Shadowplay to Davinci more compatible DNxHD and ProRes video with a video converter.
Best Software to Convert Shadowplay to Davinci Resovle
Pavtube Video Converter is free-to-try video converter and can put the Shadowplay video into whatever codec you like, but with a constant framerate. It can convert various Shadowplay to Davinci Resolve more compatible DNxHD and Apple ProRes 4444, Apple ProRes 422 (HQ), Apple ProRes 422, Apple ProRes 422 (LT), Apple ProRes 422 (Proxy) with excellent video quality.
You can configure the video and audio encoder codec, video frame rate, video bitrate, video resolution, audio channel, audio sample rate, audio bitrate to make your output video most compatible with Davinci Resovle. Besides Shadowplay, it also can convert OBS video, Action! recording, Bandicam recording, XSplit Gamecaster recording, D3DGear recording, Dxtory files, Fraps files, WM Capture files, Tivo recordings files to Davinci Resovle. For Mac users, you can turn to Pavtube Video Converter for Mac to convert Shadowplay video files into Davinci.
Steps to Transcode Shadowplay Video to Davinci Resovle
Step 1: Load Shadowplay video files
Install and launch Pavtube Shadowplay to Davinci Video Converter and load source Shadowplay MP4 clips to it. You can import ShadowPlay clips to the program through "Add Video" button or "Add from folder" button. "Drag-and-Drop" feature and batch conversion is also supported.

Step 2: Specify output file format for Davinci Resolve
Hit Format bar to select output format. You can choose Avid Media Composer > Avid DNxHD(*.mov) as output format. It is an ideal editing format for Resolve. Of course, you can also click "Common Video" > "MOV - QuickTime (*.MOV)" as the target format. Click “Settings” button if you’d like to customize advanced audio and video parameters like Video Codec, aspect ratio, bit rate, frame rate, Audio codec, sample rate, audio channels.

You can click the "Edit" button on the main UI and edit your movies before conversion. Many video editing options are available: Trim, Crop, Text Watermark, Image/Video Watermark, Effect, Audio Editor, and Subtitle.
Step 3: Start converting Shadowplay to Resovle friendly video format
Click "Convert" button to start transcoding Shadowplay MP4 video to Davinci Resolve supported files. When the conversion task is finished, click "Open" button to get the exported files.
How to Import Video into DaVinci Resolve?
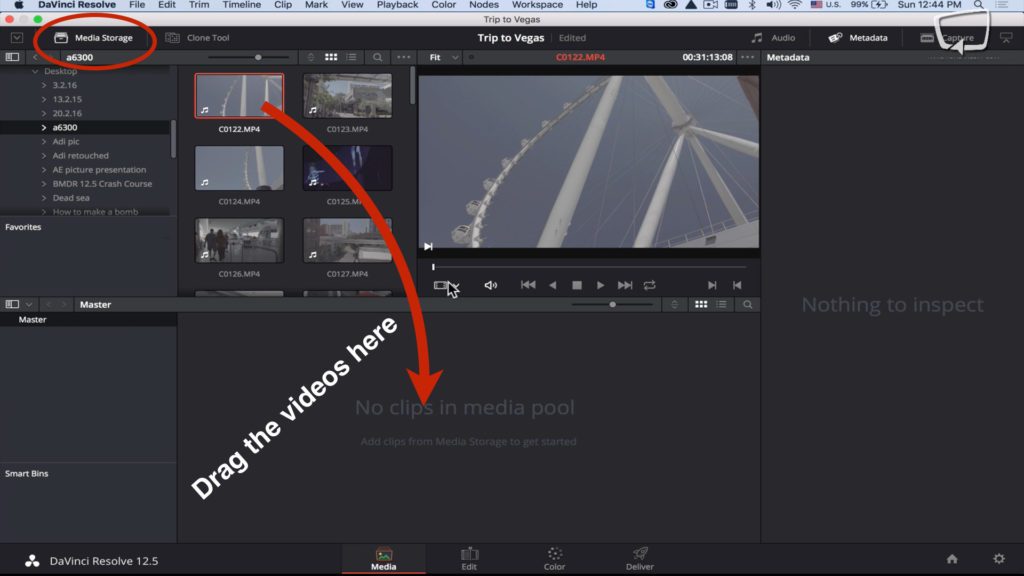
In order to import media from your media storage to the media pool, you have to select the media that you want to upload and then just drag it to the media pool.

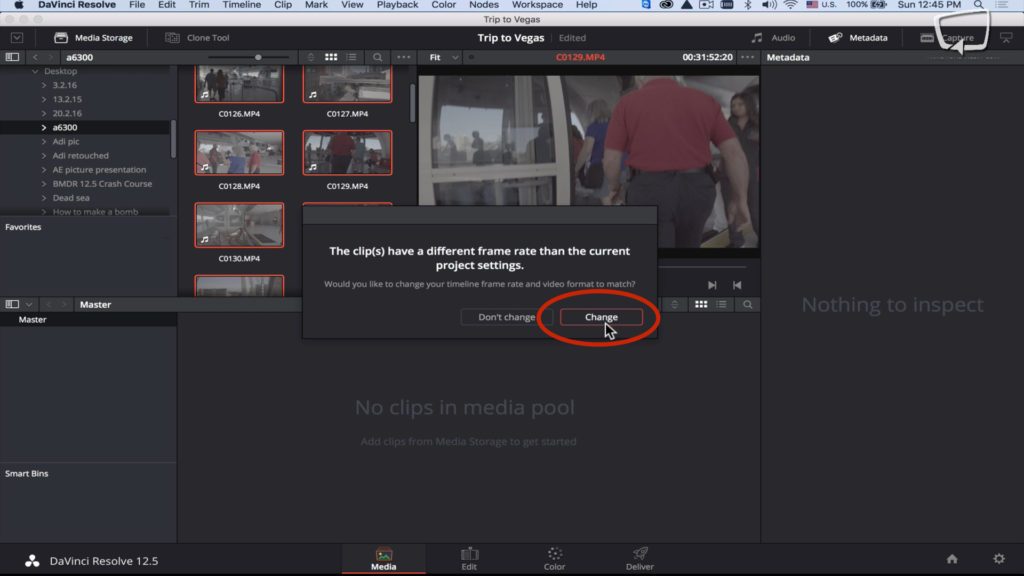
If you get a pop up message that asks you if you want to change the frame rate of the timeline to the frame rate of your media because they don’t match, you should click on “Change”.

By double clicking on a video in the media pool, and pressing the play button you can simply preview the shot.
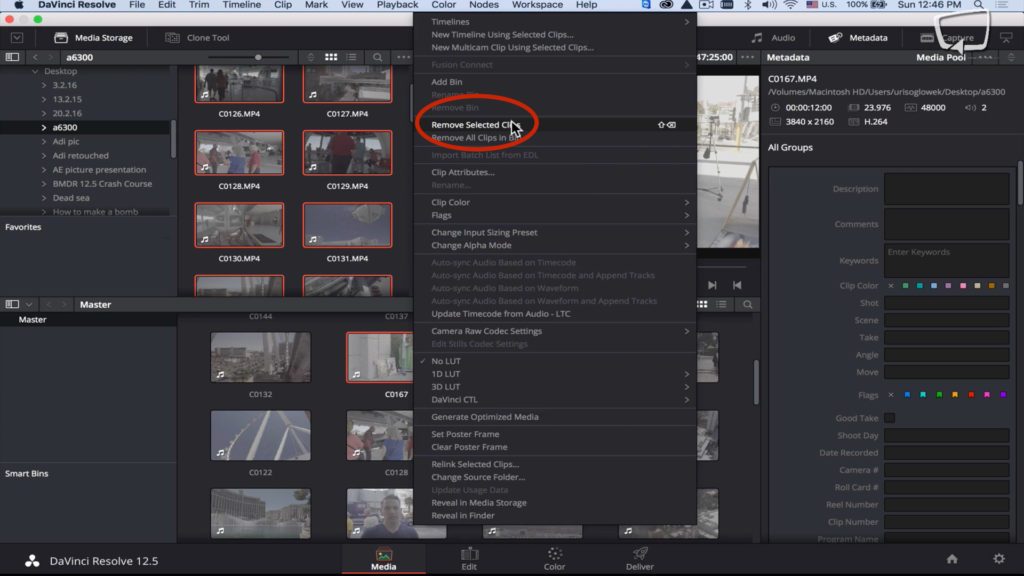
In order to delete a video from the media pool just right click it and press “Remove Selected Clips”

Useful Tips
- How to Flip or Rotate Videos using Handbrake?
- Play Tivo Recordings with Windows Media Player
- How to Use VLC to Convert AVI to MP4 on PC/Mac?
- MOV Compressor: How to Compress MOV to a Smaller Size on Windows/Mac?
- Stream 4K Video to Chromecast Ultra via Plex
- Get Chromebook Pro/Plus to Play MKV Files without Any Problem


 Home
Home

 Free Trial Video Converter


