Home
HomeTo configure options, you can click the “Options” icon to enter the interface. There are General tab, Snapshot tab, Decoder Tab and Convert tab.
General
1. File Exists Action - Rename, Overwrite or Skip when the output file shares the same name with an existing file in the output folder.
Rename: Select “Rename” to generate a new name for present output file to avoid overwriting the existing file. The automatically generated name is formed with the existing name and orderly number.
Overwrite: Select “Overwrite” to replace existing file with present output file.
Skip: Select “Skip” to cancel converting output file that shares the same name with an existing file in the output folder.
2. Update Settings
You can choose “Auto Update”, “Manual Update” or “Update Every * Days” as update settings.

Snapshot
Choose Output Folder: Click “Browse” button to choose the output folder for snapshot images.
Choose Format: Select output format for snapshot images.
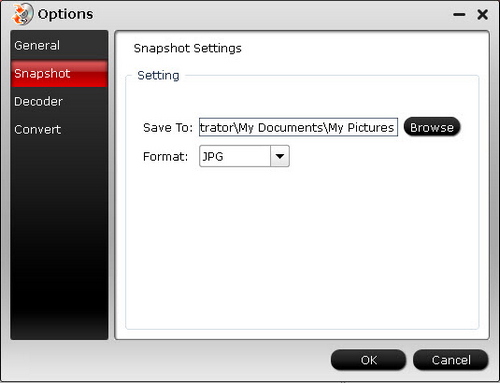
Save To:
Save the snapshots to your PC and specify the address.
Format:
Choose a format from *.jpg, *.bmp, *.png, *.tiff for the snapshot to save as.
Note: The option settings will be preserved and recur as default settings automatically at next run.
Decoder
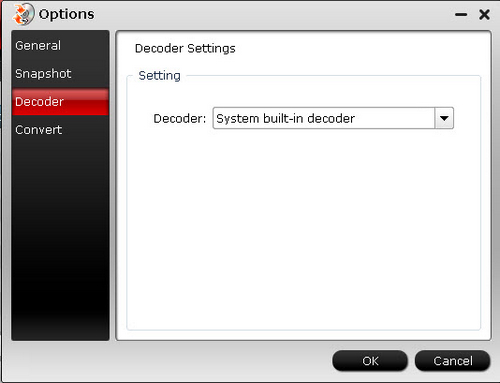
Decoder: You can choose system built-in decoder or CUDA decoder (if your graphics card is NVIDA).
Convert
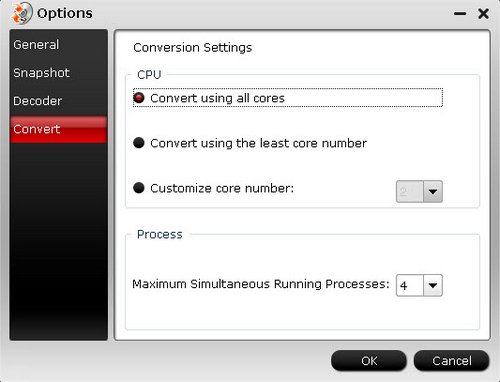
CPU: You can choose how many cores you need to use for converting.
Process: Here you can set the maximum simultaneous running process.